TinyMCE 是一个开源的(LGPL 授权协议)富文本编辑器.
本文的软件环境如下:
1 "@tinymce/tinymce-vue": "2.1.0"
2 "tinymce": "^5.0.7"
3 "vue": "^2.6.10"
安装
TinyMCE 官方提供了 tinymce-vue 供 Vue 用户使用.
GitHub - tinymce/tinymce-vue: Official TinyMCE Vue component
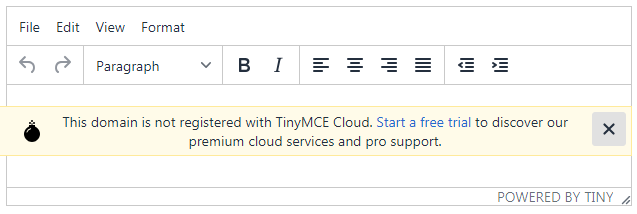
但是 tinymce-vue 默认使用的是官方的 CDN,需要到官网注册帐号,否则会有个提示.
feat: add prefer cdn url config by yugasun · Pull Request #6 · tinymce/tinymce-vue · GitHub
如果不想用官方的 CDN,可以手动载入TinyMCE.
安装依赖:
1
2
| yarn add @tinymce/tinymce-vue@2.1.0
yarn add tinymce@5.0.7
|
示例代码:
1
2
3
4
5
6
7
8
9
10
11
12
13
14
15
16
17
18
19
20
21
| <template>
<editor :init="init" v-model="data"></editor>
</template>
<script>
import tinymce from 'tinymce/tinymce';
import 'tinymce/themes/silver/theme.min.js';
import 'tinymce/skins/ui/oxide/skin.min.css';
import Editor from '@tinymce/tinymce-vue';
export default {
data() {
return {
data: '',
init: {}
};
},
components: {
Editor
}
};
</script>
|
也可以不用 tinymce-vue, 自己封装 tinymce.
1
2
3
4
5
6
7
8
9
10
11
12
13
14
15
16
17
| <template>
<div id="tinymce-vue"></div>
</template>
<script>
import Tinymce from 'tinymce/tinymce';
import 'tinymce/themes/silver';
import 'tinymce/skins/ui/oxide/skin.min.css';
export default {
mounted() {
Tinymce.init({
selector: '#tinymce-vue'
});
}
};
</script>
|
或者用 <script> 标签全局引入. 当然,官方的 CDN 也要注册.
TinyMCE | Quick start
不想用官方的 CDN 的话可以自己编译代码.过程如下:
GitHub - tinymce/tinymce: The world's #1 JavaScript library for rich text editing. Available for React, Vue and Angular
1
2
3
4
5
6
7
8
|
git clone https:
cd tinymce
yarn
yarn build
|
编译好的文件在 dist 文件夹里,找到 tinymce_5.x.x.zip 解压即可.
然后把解压得到的 tinymce 文件夹放在 public/js 中, 打开 public/index.html,添加如下代码:
1
| <script src="./js/tinymce/tinymce.min.js"></script>
|
在 Vue component 中,可以通过 window.tinymce 来使用 tinymce.
1
2
3
4
5
6
7
8
9
10
11
12
13
14
| <template>
<div id="tinymce-vue"></div>
</template>
<script>
export default {
mounted() {
window.tinymce.init({
selector: '#tinymce-vue',
plugins: 'image',
toolbar: 'image'
});
}
};
</script>
|
语言包
中文之类的语言包需要到下面这个地址下载,这里以 zh_CN.js 为例:
Language Packages | TinyMCE
如果是用 <script> 全局引入的 tinymce,直接把 zh_CN.js 丢到 langs 文件夹里即可:
1
2
3
4
5
6
7
8
9
10
11
12
13
14
| <template>
<div id="tinymce-vue"></div>
</template>
<script>
export default {
mounted() {
window.tinymce.init({
selector: '#tinymce-vue',
language: 'zh_CN',
});
}
};
</script>
|
如果是用 import 方法引入的 tinymce, 则需要手动引入 zh_CN.js.
1
| import './tinymce/langs/zh_CN.js';
|
引入之后可能会报错:
error: Unnecessary escape character: / (no-useless-escape) at
不过这个报错没啥影响, 打开 zh_CN.js,直接用 eslint-disable 注释掉即可.
1
2
3
|
tinymce.addI18n('zh_CN',{ ...
|
import 方法载入的 tinymce 需要单独引入插件/主题.
而用 <script> 标签全局载入的则不需要,以下不再赘述.
当前阶段最好还是用 <script> 标签全局载入比较好, 省事还没 bug.
载入插件
这里以 image 插件为例, 还是分两种方法讨论
1 <scritp>
1
2
3
4
5
6
7
8
9
10
11
12
13
14
| <template>
<div id="tinymce-vue"></div>
</template>
<script>
export default {
mounted() {
tinymce.init({
selector: '#tinymce-vue',
plugins: 'image imagetools',
toolbar: 'image '
});
}
};
</script>
|
2 import
1
2
3
4
5
6
7
8
9
10
11
12
13
14
15
16
17
18
19
20
21
| <template>
<div id="tinymce-vue"></div>
</template>
<script>
import tinymce from 'tinymce/tinymce';
import 'tinymce/themes/silver';
import 'tinymce/skins/ui/oxide/skin.min.css';
import 'tinymce/plugins/image';
import 'tinymce/plugins/imagetools';
export default {
mounted() {
tinymce.init({
selector: '#tinymce-vue',
plugins: 'image imagetools',
toolbar: 'image'
});
}
};
</script>
|
注意, 跨域图片无法使用 imagetools javascript - TinyMCE Image Tools Not Working - Stack Overflow
图片上传
image 插件有两个常用的参数
1 images_upload_url 上传地址, 无此参数时不显示上传选项.
2 images_upload_handler 覆盖默认的上传逻辑. 接受 function 作为参数, 有3个参数blobInfo, success, failure.
TinyMCE | Image & file upload options
这里以 sm 图床为例 上传 API 文档 - SM.MS - Simple Free Image Hosting
1
2
3
4
5
6
7
8
9
10
11
12
13
14
15
16
17
18
19
20
21
22
23
24
25
26
27
28
29
30
31
32
33
34
35
36
37
38
39
40
41
42
43
| <template>
<div id="tinymce-vue"></div>
</template>
<script>
const __IMG_UPLOAD_URL__ = 'https://sm.ms/api/upload';
export default {
mounted() {
window.tinymce.init({
selector: '#tinymce-vue',
plugins: 'image',
toolbar: 'image ',
images_upload_url: __IMG_UPLOAD_URL__,
images_upload_handler: function(blobInfo, success, failure) {
var xhr, formData;
xhr = new XMLHttpRequest();
xhr.withCredentials = false;
xhr.open('POST', __IMG_UPLOAD_URL__);
xhr.onload = function() {
var json;
if (xhr.status != 200) {
failure('HTTP Error: ' + xhr.status);
return;
}
json = JSON.parse(xhr.responseText);
if (!json || typeof json.data.url != 'string') {
failure('Invalid JSON: ' + xhr.responseText);
return;
}
success(json.data.url);
};
formData = new FormData();
formData.set('smfile', blobInfo.blob());
xhr.send(formData);
}
});
}
};
</script>
|
封装为 Vue Component
用 v-model 传入初始文本, 配合 tinymce 的 change 和 keyup 事件, 自动更新数据.
用到的Api:
1 editor.setContent 和 editor.getContent 用于设置和获取 tinymce 的文本内容.
TinyMCE | tinymce.Editor
2 setup 参数接收一个 function作为参数, 该函数将在 tinymce 渲染(rended)前被调用. 函数的参数 editor 为当前编辑器的实例.
TinyMCE | Integration and setup options
components/tinymce-vue/tinymce-vue.vue
1
2
3
4
5
6
7
8
9
10
11
12
13
14
15
16
17
18
19
20
21
22
23
24
25
26
27
28
29
30
31
32
33
34
35
36
37
38
39
40
41
| <template>
<div id="tinymce-vue"></div>
</template>
<script>
export default {
model: {
prop: 'content',
event: 'changeContent'
},
props: {
content: {
type: String,
default: ''
}
},
mounted() {
const vm = this;
window.tinymce
.init({
selector: '#tinymce-vue',
setup: function(editor) {
editor.on('change keyup', () => {
const content = editor.getContent();
vm.$emit('changeContent', content);
});
}
})
.then(editors => {
this.editor = editors[0];
this.editor.setContent(this.content);
});
},
beforeDestroy() {
this.editor.remove();
this.editor.destroy();
},
};
</script>
|
使用方式
1
| <tinymce-vue v-model="content"></tinymce>
|
另外,也可以用 v-bind 传设置参数进来, 然后用 Object.assign 和默认设置合并.
插件开发
以 line-height 插件为例:
1
2
3
4
5
6
7
8
9
10
11
12
13
14
15
16
17
18
19
20
21
22
23
24
25
26
27
28
29
30
31
32
33
34
35
36
37
38
39
40
41
42
43
44
45
46
47
48
49
50
51
52
53
54
55
56
57
58
59
60
61
| !(function() {
'use strict';
const global = tinymce.util.Tools.resolve('tinymce.PluginManager');
global.add('lineheight', function(editor) {
editor.on('init', function() {
editor.formatter.register({
lineheight: {
selector: 'p,h1,h2,h3,h4,h5,h6,td,th,div,ul,ol,li,table',
styles: { 'line-height': '%value' }
}
});
editor.ui.registry.addIcon(
'line-height',
`
<svg xmlns="http://www.w3.org/2000/svg" width="24" height="24" viewBox="0 0 24 24">
<path d="M9.984 12.984v-1.969h12v1.969h-12zM9.984 18.984v-1.969h12v1.969h-12zM9.984 5.016h12v1.969h-12v-1.969zM6 6.984v10.031h2.484l-3.469 3.469-3.516-3.469h2.484v-10.031h-2.484l3.516-3.469 3.469 3.469h-2.484z"></path>
</svg>
`
);
});
editor.ui.registry.addMenuButton('lineheightselect', {
tooltip: 'Line height',
icon: 'line-height',
fetch: function(callback) {
const defaultLineHeightFormats = '1 1.5 1.75 2 3 4 5';
const userSettings = editor.settings.lineheight_formats;
const lineheightFormats = typeof userSettings === 'string' ? userSettings : defaultLineHeightFormats;
const items = lineheightFormats.split(' ').map(item => {
let text = item,
value = item;
const values = item.split('=');
if (values.length > 1) {
[text, value] = values;
}
return {
type: 'menuitem',
text: text,
onAction: function() {
editor.formatter.apply('lineheight', { value: value });
editor.fire('change', {});
}
};
});
callback(items);
}
});
});
})();
|
API文档:
fetch
formatter
formatter参数
参考
在 Vue 项目中引入 tinymce 富文本编辑器 - Wise.Wrong - 博客园
Vue 中使用 TinyMCE | 公孙二狗
富文本 | vue-element-admin
How to Upload Image in TinyMCE Editor using PHP - CodexWorld