监控用户touch事件, 根据移动距离修改图像的高度及缩放尺寸.
用.img-container元素包裹图像,搭配height和overflow来控制图片的显示高度.
html代码:
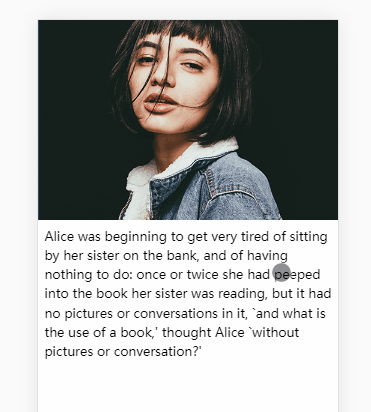
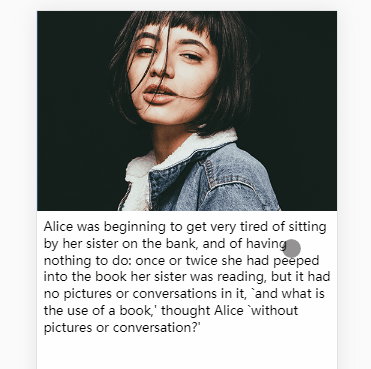
1 2 3 4 5 <body > <div class ="img-container" > <img class ="img" src ="./2.png" > </div > </body >
css代码:
1
2
3
4
5
6
7
8
9
10
11
12
13
14
.img-container { position : relative; height : 250px ; overflow : hidden; background-color : cornflowerblue; } img { position : absolute; top : 50% ; left : 50% ; transform : translate (-50% , -50% ); width : 100% ; }
用户拖动移动端页面时,会分别触发touchstart touchmove touchend事件,这三个事件分别对应手指按下 拖动 抬起.
在touchstart事件中(手指点击时), 保存手指按下时的初始位置.
1
2
3
4
5
6
let startYwindow .addEventListener ('touchstart' , (e ) => { const y = e.targetTouches [0 ].clientY startY = y })
在touchmove事件中(手指滑动时), 根据startY和y(当前触摸点位置)判断用户滑动方向.
1
2
3
4
5
6
7
8
9
10
11
12
13
14
15
16
window .addEventListener ('touchmove' , (e ) => { const y = e.targetTouches [0 ].clientY const scrollTop = imgContEl.scrollTop const moveDis = y - startY if (window .scrollY <= 0 && moveDis > 0 ) { const height = easeOutCubic (moveDis, imgHeight, 130 , 300 ) imgContEl.style .height = height + 'px' const scale = easeOutCubic (moveDis, 1 , 0.2 , 300 ) imgEl.style .transform = `translate(-50%, -50%) scale(${scale} )` } })
easeOutCubic是一个三次方ease-out缓动函数,可以制造类似橡皮筋的效果.
1
2
3
4
5
const easeOutCubic = (t, b, c, d ) => { t /= d; t--; return c * (t * t * t + 1 ) + b; };
在touchend事件中(用户松手时), 还原图像大小.
1
2
3
4
5
6
7
8
window .addEventListener ('touchend' , (e ) => { imgContEl.style .height = imgHeight + 'px' imgEl.style .transform = 'translate(-50%, -50%)' imgContEl.classList .add ('rebound' ) imgEl.classList .add ('rebound' ) })
css代码:
1
2
3
.rebound { transition : 0.2s ease-out; }
除了ease-out, 还可以用cubic-bezier制造回弹效果.
1
2
3
.rebound { transition : 0.4s cubic-bezier (0.175 , 0.885 , 0.32 , 1.275 ); }
移动端浏览器和桌面端不同,有自己的下拉效果.
在一般元素绑定的事件内, 可以用event.preventDefault()阻止触发浏览器自带的事件.
Unable to preventDefault inside passive event listener due to target being treated as passive.
这和addEventListener的第三个参数有关, 这个参数除了传入Boolean之外,还可以传入对象,例如:
1
2
3
4
document .body .addEventListener ('touchmove' ,calback, { capture : false , passive : false })
关键点就在于第三个参数中的passive属性.
当passive为true时, 浏览器会忽略calback中所有的preventDefault调用.
passive的默认值是false,但有三个例外: Window document document.body.这三个元素的passive值默认为true.
如果想在这三个元素中调用preventDefault,则需要手动设置passive属性为false.
1 window .addEventListener ('touchmove' , (e ) => {}, {passive : false })
1
2
3
4
5
6
7
8
9
10
11
12
13
14
15
16
17
18
19
20
21
22
23
24
25
26
27
28
29
30
31
32
33
34
35
36
37
38
39
40
41
42
43
44
45
46
47
48
49
50
51
52
53
54
55
56
57
58
59
60
61
62
63
64
65
66
67
68
69
70
71
72
73
74
75
76
77
78
79
80
81
82
83
84
85
86
87
88
89
90
91
92
93
94
95
96
97
<!DOCTYPE html > <html lang ="en" > <head > <meta charset ="UTF-8" > <meta name ="viewport" content ="width=device-width, initial-scale=1.0" > <meta http-equiv ="X-UA-Compatible" content ="ie=edge" > <title > drop down</title > <style > body { margin : 0 ; line-height : 1.5 ; } .img-container { position : relative; height : 250px ; overflow : hidden; background-color : cornflowerblue; } img { position : absolute; top : 50% ; left : 50% ; transform : translate (-50% , -50% ); width : 100% ; } .rebound { transition : 0.2s ease-out; } .article { margin : 8px ; height : 100vh ; } </style > </head > <body > <div class ="img-container" > <img class ="img" src ="./2.png" > </div > <div class ="article" > Alice was beginning to get very tired of sitting by her sister on the bank, and of having nothing to do: once or twice she had peeped into the book her sister was reading, but it had no pictures or conversations in it, `and what is the use of a book,' thought Alice `without pictures or conversation?' </div > <script > const easeOutCubic = (t, b, c, d ) => { t /= d; t--; return c * (t * t * t + 1 ) + b; }; const imgContEl = document .querySelector ('.img-container' ) const imgEl = document .querySelector ('.img' ) const imgHeight = imgContEl.clientHeight let startY window .addEventListener ('touchstart' , (e ) => { const y = e.targetTouches [0 ].clientY if (y < imgHeight) { return } startY = y imgContEl.classList .remove ('rebound' ) imgEl.classList .remove ('rebound' ) }) window .addEventListener ('touchmove' , (e ) => { if (!startY) { return } e.preventDefault () const y = e.targetTouches [0 ].clientY const scrollTop = imgContEl.scrollTop const moveDis = y - startY if (window .scrollY <= 0 && moveDis > 0 ) { const height = easeOutCubic (moveDis, imgHeight, 130 , 300 ) imgContEl.style .height = height + 'px' const scale = easeOutCubic (moveDis, 1 , 0.2 , 300 ) imgEl.style .transform = `translate(-50%, -50%) scale(${scale} )` } }, { passive : false }) window .addEventListener ('touchend' , (e ) => { startY = null imgContEl.style .height = imgHeight + 'px' imgEl.style .transform = 'translate(-50%, -50%)' imgContEl.classList .add ('rebound' ) imgEl.classList .add ('rebound' ) }) </script > </body > </html >
还有一种实现结构是利用背景配合background-position和background-size来定位和居中图片.
拉到头时背景有轻微的抖动:
1
2
3
4
5
6
7
8
9
10
11
12
13
14
15
16
17
18
19
20
21
22
23
24
25
26
27
28
29
30
31
32
33
34
35
36
37
38
39
40
41
42
43
44
45
46
47
48
49
50
51
52
53
54
55
56
57
58
59
60
61
62
63
64
65
66
67
68
69
70
71
72
73
74
75
76
77
78
79
80
<!DOCTYPE html > <html lang ="en" > <head > <meta charset ="UTF-8" > <meta name ="viewport" content ="width=device-width, initial-scale=1.0" > <meta http-equiv ="X-UA-Compatible" content ="ie=edge" > <title > drop down</title > <style > body { margin : 0 ; } .img-container { height : 250px ; background-image : url ('./2.png' ); background-size : 100% auto; background-position : center; background-repeat : no-repeat; background-color : cornflowerblue; } .rebound { transition : 0.2s ease-out; } .article { height : 100vh ; } </style > </head > <body > <div class ="img-container" > </div > <div class ="article" > </div > <script > const easeOutCubic = (t, b, c, d ) => { t /= d; t--; return c * (t * t * t + 1 ) + b; }; const imgContEl = document .querySelector ('.img-container' ) const imgHeight = imgContEl.clientHeight let startX, startY window .addEventListener ('touchstart' , (e ) => { const y = e.targetTouches [0 ].clientY if (y < imgHeight) { return } startY = y imgContEl.classList .remove ('rebound' ) }) window .addEventListener ('touchmove' , (e ) => { if (!startY) { return } e.preventDefault () const y = e.targetTouches [0 ].clientY const scrollTop = imgContEl.scrollTop const moveDis = y - startY if (window .scrollY <= 0 && moveDis > 0 ) { const height = easeOutCubic (moveDis, imgHeight, 130 , 300 ) imgContEl.style .height = height + 'px' const scale = easeOutCubic (moveDis, 100 , 20 , 300 ) imgContEl.style .backgroundSize = `${scale} % auto` } }, { passive : false }) window .addEventListener ('touchend' , (e ) => { startY = null imgContEl.style .height = imgHeight + 'px' imgContEl.style .backgroundSize = '100% auto' imgContEl.classList .add ('rebound' ) }) </script > </body > </html >
关于passive event listener的一次踩坑 - 掘金 EventTarget.addEventListener() - Web API 接口参考 | MDN TouchEvent.targetTouches - Web APIs | MDN Touch.clientX - Web API 接口参考 | MDN